Friday 19 August 2011

Guest Interview - Nicky Townsend, Enchanted Handmade Jewellery

A little bit about Nicky:
Nicky Townsend is the designer and creator behind Enchanted Handmade Jewellery and is renowned for her gorgeous and intricate charm bracelets. Nicky’s work can be found online at http://www.enchantedhandmadejewellery.com/

Nicky is a regular contributor to Making Jewellery magazine and has recently begun to teach workshops at the Magick Minx Studio in Hinckley, Leicestershire. She’ll also be joining up with Beadelicious at the Nottingham Bead Fair at the Gateway Hotel on 20 November to run more of her workshops.

Blog: There is a blog page on my website but I’m shamefully bad at keeping it up to date - sorry! You can also find me on Facebook under Enchanted Handmade Jewellery, I’m much better at keeping that up to date.

How long have you been making jewellery and how did it all begin?
Although I have a design background I never really took an interest in jewellery until later on.  I left school and studied fashion design at college and then had my son at an early age so had to put my ‘career’ on hold.

My bead ‘obsession’ began around 8 years ago in 2003 whilst I was suffering with a severe bout of depression. I was working in quite a stressful job at the time as a Teaching Assistant to children with behavioural problems. At the same time my own 10 year old son was diagnosed with Tourette’s syndrome, ADHD and OCD and my partner who had been in the army for 12 years suffered a mental breakdown. Within a very short space of time I found myself being a full time carer to my partner and was unable to cope with the added pressures of work, I was also of course trying to deal with my own depression it was then that I discovered beads…my saviour! I found that I could lose myself and clear my head for hours at a time whilst beading and creating jewellery and this became my therapeutic hobby. The hobby evolved into a full time business later on, in around 2007.

What inspires you?
My inspiration comes from colour and nature. You will usually find all kinds of insects and bugs nestling between the flowers and leaves that I like to incorporate into my pieces. My favourites are butterflies and ladybirds.

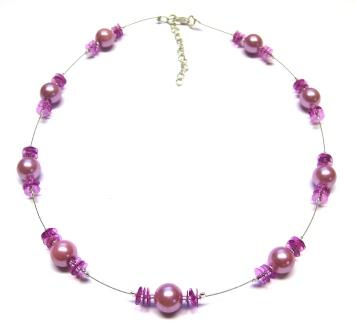
The main feature of Enchanted jewellery is the size. I create bright, bold and chunky jewellery that is made to be seen and stand out in the crowd. I’ve always had a love of colour, and seem to have a good eye for putting unusual mixes of colour together in my work, I receive lots of compliments on my use of colour.

What equipment and techniques do you use in your work?
There is no specialised equipment used in the
making of my jewellery, the only tools I use are the usual jewellery makers pliers - round nosed, chain nosed, wire cutters and crimping pliers. My favourite tool though has to be my jump ring tool! Lots of people find they can’t use them but I would definitely be lost without mine.

During the process of making one of my charm bracelets I can perform a wrapped loop on up to 100 beads! This is a technique I have now perfected and my wrapped loops are very neat,
even if I do say so myself.  I can now do this without the sore thumbs and it no longer takes me days to finish a bracelet. These 100 beads are then attached to chain with jump rings, so you can now understand why I love my jump ring tool so much :0)

Where can people learn more about your work and the workshops you offer?
I have a page on my website that is dedicated to my beading workshops which are taught at the Magick Minx Studio in Hinckley, Leicestershire. I’m currently in the process of developing some brand new workshops and the details of these will be added to the website soon. At the moment there are 3 workshops available, each being a unique Enchanted design, including the Floral Charm Bracelet which anyone can come along and learn to make. There is a section on the Magick Minx Productions website - http://www.magickminxproductions.com/ which has full details on the Enchanted @ Magick Minx Beading Workshops.

People can also find regular projects designed by myself in Making Jewellery magazine. I’ve been a regular contributor to Making Jewellery for 2 years now and I like to design projects that are simple to create, easy enough for total beginners but just as much fun for more advanced jewellery makers.

What advice would you give to others interested in making and selling their own jewellery?
My advice to those interested in making jewellery would be to develop your own unique style. Take inspiration from around you but never copy another artists work, this is frowned upon greatly in the artistic world. Take ideas and develop them to make your very own designs, this is also much more satisfying. Experiment with colours that you would never expect to ‘go’ you’ll often be pleasantly surprised!

If you would like to sell your work some of the most important pieces of advice I can give would be to ensure you are registered as self employed with HMRC.  Lots of crafters often don’t realise that it is a legal requirement that they register. I have heard the words “but it’s only my hobby” soooo many times! It doesn’t matter - if you are making a product which you then sell, even if you are only making the money back to cover your costs, you MUST register with HMRC. If you don’t, then you are trading illegally and could face prosecution!

When selling handmade products you are required by law to have Product Liability insurance. You are also required to have Public Liability insurance when selling at craft fairs etc.

When selling online you must adhere to the Distance Selling Regulations. These are a set of rules designed to protect the consumer who are not physically present with the seller at the time of purchase.


Three words that sum you up: Just like my jewellery I’m BIG, BOLD and CHEERFUL

What makes you smile: My lovely family, especially my fantastic son who is so inspirational in the way he copes with life despite his disabilities. My 3 beautiful dogs who keep me thoroughly entertained, and the wonderful compliments I receive for my work, these mean an awful lot to me - Thank you

Monday 15 August 2011

Wedding Blessing

Yesterday I had the chance to throw on my wedding dress and do the whole thing again as Mr C and I held a wedding blessing closer to home so that my elderly grandma's and family were able to attend and see us walk down the ailse.  We had a wonderful day again and both the grandma's really enjoyed themselves which made it all worthwhile.

A huge thank you goes to my mum yet again for all the wonderful cakes she baked for the afternoon tea we held after the service.  She out did herself so here's a couple of pics of just a few of her yummy creations.  I have never seen so many people move so quick once the cakes were all unveiled!


Mum's cakes are so delicious I thought I'd add them to the Handmade Monday list on 1st Unique Gifts blog http://www.1stuniquegifts.co.uk/blog/

THANK YOU MUM

Friday 12 August 2011

Funky Friday Fun

Ok, Ok  I know I have been very bad recently with posting up some Friday Fun but I'm back now and this month have a really funky little bit of fun for you.  Our large Bold and Beautiful bead necklaces went down so well I thought it'd be a good idea to share the tutorial with you all.

Please accept my apologies for the obvious mistake in the main picture, I didn't notice it till it was far too late and it was far too late in the evening to start again.  Have no fear the instructions are all correct.  Lesson learned - only one glass of vino whilst creating!!!

This project is great for beginners.

Ingredients (for the black and white design):
All beads and findings are available on our website http://www.beadelicious-beads.co.uk/
3 x large fabric and resin beads
6 x fabric knot beads
4 x burnt silver large holed beads
2 x 10mm jet fire polished beads
1 x 30 cm length of Tiger tail
4 x small jump rings
2 box ends
1m of microfibre suede
1 x lobster clasp1 x extension chain
2 x crimp beads

In addition you will require cutter pliers, a pair of flat nosed pliers and a pair of round nose pliers.

What To Do:
Take the piece of tiger tail and thread a crimp bead on followed by one of the jump rings.  Feed the tiger tail back through the crimp bead to form and loop and crimp to secure (Fig 1).  Trim off any excess wire (Fig 2).

Start threading on your beads starting with a jet 10mm fire polished bead, a large holed burnt silver bead, a fabric knot bead, a large resin bead, another knot bead, a large silver bead etc – continue on with this pattern as per the main picture adding the second 10mm fire-polished bead at the end (Fig 3).

Fig 3
Add a crimp bead onto the end of your tiger tail and then another large jump ring.  Bring the tiger tail wire back through the crimp bead to form a small loop and crimp to secure.  You now have your design strung onto the tiger tail with a jump ring attached to each end.

To add the cord measure the length required and trim to your requirements, please note you will require two pieces, one for each side and each piece will be doubled up.  Thread the first piece of cord through a jump ring on one end of the tiger tail and double up pulling the two ends together (Fig 4).  Add a cord end to the ends and repeat on the other side. 
Fig 4


Add a jump ring and lobster clasp to one cord end and a jump ring and extension chain to the other cord end to finish.

We hope you have fun making this necklace.  Please email us with any pictures if you make it up at mail@beadelicious-beads.co.uk and any pictures we post up on here will get a free mix bag of beads.


Monday 8 August 2011

Handmade Monday

Well it's a bright and sunny Monday morning again and after a great Bead Soiree at Bulkinton Village Centre on Saturday I thought Handmade Monday would be a great opportunity to to show off some of our groups fab beady creations as well as our Beadelicious project idea for this month.

First of all our August project idea, the Sequins and Pearls necklace - this went down a storm on Saturday and we had some bright and beautiful colour combinations of it created.

And now some quickpics of the jewellery created on Saturday by the girls who dropped in to join us.  Apologies for the quality of the pictures, they were taken a little impromtually.  Great work though girls!


If you would like to see more handmade loveliness then why not check out Wendy's Handmade Monday posts on her blog http://www.1stuniquegifts.co.uk/blog/

Tuesday 2 August 2011

Lots of New Beady Goodies

We've been off bead buying again and wanted to share with you a
sneak preview of the new gorgeous new beads we now have in stock.

We have been expanding our range of Czech glass fire-polished beads.  These to me are like Walkers Crisps.   No matter how many times I venture off to Pringles, Doritos or even posh kettle chips, I always come back to Walkers as my favourite ever and the same goes for these fabulous fire-polished beads.  They go with anything and everything but also look simply stunning on their own.  We have added various 8mm and 6mm colours to our range.

We’ve also added two new colours to our Chinese Crystal range.  These sparkling natural and lilac blue shades are good enough to eat whilst the black diamond adds a little bit of glam shimmer!!


These gorgeous Indian foil lined lentil beads are simply going down a storm.  We’ve only just loaded them onto the website and already they are going like hotcakes - so much so we had to order more in straight away.


And now for something a little different.  We’re absolutely loving these larger than life resin beads that really make a statement.  We've used these in this months Project Idea - our Bold and Beautiful necklace.

If you want to see more of our beads then please visit us at http://www.beadelicious-beads.co.uk/

Monday 1 August 2011

Handmade Monday

We've been busy beading bees this weekend with two lovely Bead Soirees that took place on Friday night at Sheepy Magna Memorial Hall and on Saturday at Nuneaton Heritage Centre.  We'll be at Bulkington Village Centre this coming Saturday so if you missed out this weekend you know where to catch us next weekend. 

Here's a quick snap of one of the Project Ideas we'll be bringing with us, I had already made it using the turquoise acrylic but have been keen to use our new resin beads so I recreated a similar design using the black and white fabric encased ones which I thought would be great to showcase on the 'Handmade Monday' page of 1st Unique Gifts blog  http://www.1stuniquegifts.co.uk/blog/2011/07/handmade-monday-27-from-the-campervan-factory/